Tavern Cellar: Difference between revisions
imported>IceColdFever Added choice button name for Of Course! |
imported>Oneforfortytwo various fixes |
||
| (18 intermediate revisions by 13 users not shown) | |||
| Line 1: | Line 1: | ||
<center>{{TavernCellar|{{#rand:0|8}}|{{#rand:1|8}}}}</center> | <center>{{TavernCellar|{{#rand:0|8}}|{{#rand:1|8}}}}</center> | ||
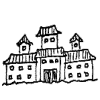
'''The Tavern Cellar''' can be found in [[The Typical Tavern]] by visiting the Tavern Cellar in the corner of the tavern. | '''The Tavern Cellar''' can be found in [[The Typical Tavern]] by visiting the Tavern Cellar in the corner of the tavern. | ||
Attempting to enter prior to talking to Bart Ender results in the text: | |||
:"You should probably talk to the bartender before you go poking around in the cellar." | |||
The combats you encounter are | The cellar consists of 24 squares of "darkness" and one square containing the stairs up. The player may proceed one square horizontally or vertically from any square already uncovered for 1 adventure, uncovering that square. | ||
Although not an adv.php zone, combat adventures occur at a rate of 80%, and +20% [[Combat Frequency]] will prevent the regular noncombats from occurring. | |||
The combats you encounter are affected by how much you have increased [[Monster Level]]. With no monster level increasers you will fight only drunken rats. The likelihood of drunken rat kings appearing is ML/300, so to guarantee them you need 300+ ML. | |||
==Combat Adventures== | ==Combat Adventures== | ||
| Line 18: | Line 20: | ||
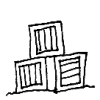
{{choice|name=1984 Had Nothing on This Cellar|image=crate_big.gif | {{choice|name=1984 Had Nothing on This Cellar|image=crate_big.gif | ||
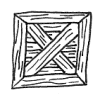
|choice1name=Dump out the crate.|choice1=3-5 {{plural|rat whisker}}, [[smiling rat]] (first time)|choice2name=Stink them out|choice2=Get rid of the crate without spending an adventure}} | |choice1name=Dump out the crate.|choice1=3-5 {{plural|rat whisker}}, [[smiling rat]] (first time)|choice2name=Stink them out|choice2=Get rid of the crate without spending an adventure<br>''(With +20 {{element|Stench}})''}} | ||
{{choice|name=A Rat's Home...|image=ratcastle.gif | {{choice|name=A Rat's Home...|image=ratcastle.gif | ||
|choice1name=Kick over the castle|choice1=3 {{plural|bottle of tequila}}|choice2name=Scare them off|choice2=Get rid of the castle without spending an adventure}} | |choice1name=Kick over the castle|choice1=3 {{plural|bottle of tequila}}|choice2name=Scare them off|choice2=Get rid of the castle without spending an adventure<br>''(With +20 {{element|Spooky}})''}} | ||
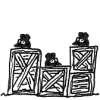
{{choice|name=Crate Expectations (Tavern Cellar){{!}}Crate Expectations|image=crates.gif|choice1name=Smash the crates|choice1=gain 3 of the following: [[bottle of gin]], [[bottle of rum]], [[bottle of vodka]], [[bottle of whiskey]], [[boxed wine]]|choice2name=Burn the crates|choice2=Get rid of the crates without spending an adventure}} | {{choice|name=Crate Expectations (Tavern Cellar){{!}}Crate Expectations|image=crates.gif|choice1name=Smash the crates|choice1=gain 3 of the following: [[bottle of gin]], [[bottle of rum]], [[bottle of vodka]], [[bottle of whiskey]], [[boxed wine]]|choice2name=Burn the crates|choice2=Get rid of the crates without spending an adventure<br>''(With +20 {{element|Hot}})''}} | ||
{{choice|name=Staring Down the Barrel|image=barrel.gif | {{choice|name=Staring Down the Barrel|image=barrel.gif | ||
|choice1name=Smash the barrel|choice1=3-5 {{plural|ice-cold Willer}}|choice2name=Freeze the Barrel|choice2=Get rid of the barrel without spending an adventure}} | |choice1name=Smash the barrel|choice1=3-5 {{plural|ice-cold Willer}}|choice2name=Freeze the Barrel|choice2=Get rid of the barrel without spending an adventure<br>''(With +20 {{element|Cold}})''}} | ||
{{choice|name=Those Who Came Before You|image=corpse.gif | {{choice|name=Those Who Came Before You|image=corpse.gif | ||
| Line 33: | Line 35: | ||
{{choice|name=Of Course!|image=faucet.gif | {{choice|name=Of Course!|image=faucet.gif | ||
|choice1name=Turn off the faucet |choice1= Turns off the Rat Faucet and completes the quest.}} | |choice1name=Turn off the faucet |choice1= Turns off the Rat Faucet and completes the quest.}} | ||
{{choice|name=Everything in Moderation|image=faucet.gif | |||
|choice1name=Turn on the faucet|choice1= Turns on the Rat Faucet and completes the quest.| | |||
note1=Replaces Of Course! in an [[Actually Ed the Undying]] run.}} | |||
{{choice|name=If it's Tiny, is it Still a Mansion?|image=mansion.gif | {{choice|name=If it's Tiny, is it Still a Mansion?|image=mansion.gif | ||
| Line 42: | Line 48: | ||
|choice2name=Leave it alone|choice2=Leave | |choice2name=Leave it alone|choice2=Leave | ||
|note1=This adventure will only appear after completing the quest by clicking on the Faucet.}} | |note1=This adventure will only appear after completing the quest by clicking on the Faucet.}} | ||
{{choice|name=Hot and Cold Dripping Rats|image=faucet.gif | |||
|choice1name=Do it|choice1=Fight a [[drunken rat]]. | |||
|choice2name=Leave it alone|choice2=Leave | |||
|note1=This adventure will only appear after completing the quest by clicking on the Faucet. | |||
|note2=Replaces Hot and Cold Running Rats in an [[Actually Ed the Undying]] run.}} | |||
==Notes== | |||
*Three squares are considered special: the [[Those Who Came Before You|corpse]], the [[Of Course!|Faucet]], and the [[If it's Tiny, is it Still a Mansion?|Baron's mansion]]. There are three regions of note, labeled A, B, and C below. | |||
A x x x x | |||
A x x x x | |||
A x x x x | |||
B B x x x | |||
B B C C C | |||
:One square in each region is one of the special squares. The first special square you encounter will be the corpse, the second the Faucet, and the third the mansion. | |||
*[[Comprehensive Cartography]] will, on your first visit to the cellar, automatically uncovers 2 squares, randomly chosen from those within 2 moves of the stairs. | |||
*Clicking on any spot (even the uncovered Rat Faucet and Tiny Mansion) with no adventures left gives this message: | |||
*:You don't have time to fumble in the dark. | |||
*Similarly, clicking on any spot while being falling-down drunk gives this message: | |||
*:You're too drunk for darkness right now. | |||
**Equipping [[Drunkula's wineglass]] won't allow adventuring here while drunk, either. You get the same message. | |||
==References== | |||
*The rats in the cellar may come from the song "Rats in the Cellar" on [[Wikipedia:Aerosmith|Aerosmith]]'s ''[[Wikipedia:Rocks (Aerosmith album)|Rocks]]'' album. | |||
[[Category:Locations]] | |||
Latest revision as of 16:55, 20 July 2023

|

|

|
|

|

|

|

|

|
|

|
|
|
|
|

|
|
|
|
|
|
|
|

|
|
|
The Tavern Cellar can be found in The Typical Tavern by visiting the Tavern Cellar in the corner of the tavern.
Attempting to enter prior to talking to Bart Ender results in the text:
- "You should probably talk to the bartender before you go poking around in the cellar."
The cellar consists of 24 squares of "darkness" and one square containing the stairs up. The player may proceed one square horizontally or vertically from any square already uncovered for 1 adventure, uncovering that square.
Although not an adv.php zone, combat adventures occur at a rate of 80%, and +20% Combat Frequency will prevent the regular noncombats from occurring.
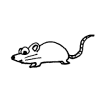
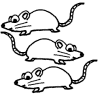
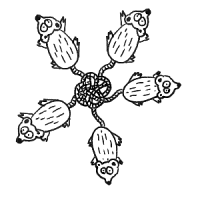
The combats you encounter are affected by how much you have increased Monster Level. With no monster level increasers you will fight only drunken rats. The likelihood of drunken rat kings appearing is ML/300, so to guarantee them you need 300+ ML.
Combat Adventures
| drunken rat | |
|
|
| bunch of drunken rats | |
|
|
| drunken rat king | |
|
|
Non-combat Adventures
| 1984 Had Nothing on This Cellar | |
|
|
| A Rat's Home... | |
|
|
| Crate Expectations | |
|
|
| Staring Down the Barrel | |

|
|
| Those Who Came Before You | |
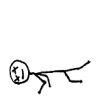
|
|
| Of Course! | |
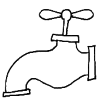
|
|
| Everything in Moderation | |
|
|
|
| If it's Tiny, is it Still a Mansion? | |
|
|
| Hot and Cold Running Rats | |
|
|
|
| Hot and Cold Dripping Rats | |
|
|
|
Notes
- Three squares are considered special: the corpse, the Faucet, and the Baron's mansion. There are three regions of note, labeled A, B, and C below.
A x x x x
A x x x x
A x x x x
B B x x x
B B C C C
- One square in each region is one of the special squares. The first special square you encounter will be the corpse, the second the Faucet, and the third the mansion.
- Comprehensive Cartography will, on your first visit to the cellar, automatically uncovers 2 squares, randomly chosen from those within 2 moves of the stairs.
- Clicking on any spot (even the uncovered Rat Faucet and Tiny Mansion) with no adventures left gives this message:
- You don't have time to fumble in the dark.
- Similarly, clicking on any spot while being falling-down drunk gives this message:
- You're too drunk for darkness right now.
- Equipping Drunkula's wineglass won't allow adventuring here while drunk, either. You get the same message.

