Meteoid/Underground: Difference between revisions
imported>Toffile No edit summary |
imported>Discordance |
||
| (19 intermediate revisions by 11 users not shown) | |||
| Line 1: | Line 1: | ||
{{adventuretop | {{NeedsContent|Win screen}} | ||
| | {{adventuretop|name=Meteoid|num=490}} | ||
|num=490}} | |||
---- | ---- | ||
*''Entering with more than one teleport charge remaning:'' | *''Entering with more than one teleport charge remaning:'' | ||
| Line 71: | Line 68: | ||
|} | |} | ||
|} | |} | ||
---- | |||
Occurs when selecting ''Teleport to Underground Complex'' from the [[Meteoid/Bridge|bridge]]. | |||
==Overview== | |||
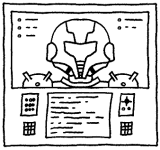
Within the underground you can explore a (randomized) 5x5 map. In each cell you can attempt to move in 4 directions, fire weapons, or perhaps activate an item. | |||
==Controls== | ==Controls== | ||
| Line 77: | Line 79: | ||
Shoot is your basic attack. It does 10 damage by default, and costs nothing to use. | Shoot is your basic attack. It does 10 damage by default, and costs nothing to use. | ||
Bombs deal 25 damage by default, and | Bombs deal 25 damage by default, and stun the enemy. They also blast open secret passages beneath you. Bombs do not work on the Cerebral Matriarch. | ||
Missiles deal 100 damage, enough to kill all enemies except the Cerebral Matriarch. They also open locked (white) doors. | Missiles deal 100 damage, enough to kill all enemies except the Cerebral Matriarch. They also open locked (white) doors. | ||
| Line 83: | Line 85: | ||
You are able to skip past enemies, but they will deal damage. | You are able to skip past enemies, but they will deal damage. | ||
On the minimap, enemies are marked by an '''E''', artifacts are marked by a '''T''', charge stations are marked by a '''C''', and the exit teleporter is marked by an '''X'''. Missile doors are shown as a thin vertical line. Blastable floors will not be marked by the minimap. | On the minimap, enemies are marked by an '''E''', artifacts are marked by a '''T''', charge stations are marked by a '''C''', map data terminals are marked by an '''M''' and the exit teleporter is marked by an '''X'''. Missile doors are shown as a thin vertical line. Blastable floors will not be marked by the minimap, but will always be in the 'rocky' rooms. | ||
==Map Notes== | |||
The Exit, Map, and Recharge rooms will always be accessable (not behind missile-doors), and there will always be one of each per level except the last. | |||
The final level has a Map and Recharge room, but no exit, instead having the Cerebral Matriarch. The first two will be 'open', while the Matriarch will require a missile door to be opened. The final level also does not have treasure rooms. | |||
There are no bombable floors beneath map stations, charge stations, teleporters or start points. | |||
==Map Features== | ==Map Features== | ||
| Line 112: | Line 122: | ||
| | | | ||
{{Meteoid/Room|corner=Pipebrick.gif|left=Leftwall_pipe_solid.gif|right=Rightwall_pipe_door.gif|top=ceiling_pipe_solid.gif|bottom=ceiling_pipe_solid.gif|room=maproom_left.gif}} | {{Meteoid/Room|corner=Pipebrick.gif|left=Leftwall_pipe_solid.gif|right=Rightwall_pipe_door.gif|top=ceiling_pipe_solid.gif|bottom=ceiling_pipe_solid.gif|room=maproom_left.gif}} | ||
|Activating this device will fill in your map. Besides the layout, the charging room and exit room will be marked. | |Activating this device will fill in your map. Besides the layout, the charging room and exit room will be marked. If you already have the visor upgrade, enemies and treasure will also be marked. | ||
|} | |} | ||
*The exit room: | *The exit room: | ||
| Line 119: | Line 129: | ||
| | | | ||
{{Meteoid/Room|corner=Pipebrick.gif|left=Leftwall_pipe_door.gif|right=Rightwall_pipe_solid.gif|top=ceiling_pipe_solid.gif|bottom=ceiling_pipe_solid.gif|room=exitroom.gif}} | {{Meteoid/Room|corner=Pipebrick.gif|left=Leftwall_pipe_door.gif|right=Rightwall_pipe_solid.gif|top=ceiling_pipe_solid.gif|bottom=ceiling_pipe_solid.gif|room=exitroom.gif}} | ||
|From the exit room you can leave the underground and teleport back to your ship. Exit rooms are marked on your map with an "X" | |From the exit room you can leave the underground and teleport back to your ship. They are always entered from the left. Exit rooms are marked on your map with an "X" | ||
|} | |} | ||
*The treasure room: | *The treasure room: | ||
| Line 130: | Line 140: | ||
==Treasures== | ==Treasures== | ||
* Credcrystals | * Credcrystals, ~100 for rocketsnail access, 250-350 for bomb/missile, ~500 for RS+B/M, and <800 for many B/Ms | ||
* Visor Upgrade - Shows monster's energy, and provides more detail in the map room. | * Visor Upgrade - Shows monster's energy, and provides more detail in the map room. Almost always obtained in the 1st or 2nd level. | ||
* Armor Upgrade - Reduces damage from monsters by 25%, rounded up. | * Armor Upgrade - Reduces damage from monsters by 25%, rounded up. | ||
* Gun Upgrade - Raises gun damage by 10. | * Gun Upgrade - Raises gun damage by 10. | ||
* Bomb Upgrade - Doubles bomb damage to 50. | * Bomb Upgrade - Doubles bomb damage to 50. | ||
* Extra Teleport - Allows you to visit one more underground complex. | * Extra Teleport - Allows you to visit one more underground complex. Can only be obtained in the 4th level. | ||
==Monsters== | ==Monsters== | ||
| Line 143: | Line 153: | ||
| | | | ||
{{Meteoid/Room|corner=Pipebrick.gif|left=Leftwall_pipe_door.gif|right=Rightwall_pipe_missiledoor.gif|top=ceiling_pipe_solid.gif|bottom=ceiling_open.gif|room1=Decor2_pipe_left.gif|room2=Decor2_pipe_right_m1.gif}} | {{Meteoid/Room|corner=Pipebrick.gif|left=Leftwall_pipe_door.gif|right=Rightwall_pipe_missiledoor.gif|top=ceiling_pipe_solid.gif|bottom=ceiling_open.gif|room1=Decor2_pipe_left.gif|room2=Decor2_pipe_right_m1.gif}} | ||
|Snugglecrawlers do 5 energy damage and have 15 energy. | |Snugglecrawlers do 5 energy damage and have 15 energy. They will drop either credcrystals or replenish some energy. | ||
|} | |} | ||
*Shriekwing: | *Shriekwing: | ||
| Line 150: | Line 160: | ||
| | | | ||
{{Meteoid/Room|room1=Decor2_rock_left.gif|room2=Decor2_rock_right_m2.gif|left=Leftwall_rock_door.gif|right=Rightwall_rock_solid.gif}} | {{Meteoid/Room|room1=Decor2_rock_left.gif|room2=Decor2_rock_right_m2.gif|left=Leftwall_rock_door.gif|right=Rightwall_rock_solid.gif}} | ||
|Shriekwings do 10 energy damage and have 25 energy. | |Shriekwings do 10 energy damage and have 25 energy. They will drop either credcrystals or replenish some energy. | ||
|} | |} | ||
*Eyeslug | *Eyeslug | ||
| Line 157: | Line 167: | ||
| | | | ||
{{Meteoid/Room|corner=Pipebrick.gif|left=Leftwall_pipe_door.gif|right=Rightwall_pipe_missiledoor.gif|top=ceiling_pipe_solid.gif|bottom=ceiling_open.gif|room1=Decor1_pipe_left.gif|room2=Decor1_pipe_right_m3.gif}} | {{Meteoid/Room|corner=Pipebrick.gif|left=Leftwall_pipe_door.gif|right=Rightwall_pipe_missiledoor.gif|top=ceiling_pipe_solid.gif|bottom=ceiling_open.gif|room1=Decor1_pipe_left.gif|room2=Decor1_pipe_right_m3.gif}} | ||
|Eyeslugs do 15 energy damage and have 35 energy. | |Eyeslugs do 15 energy damage and have 35 energy. They will drop either credcrystals, replenish some energy or drop an extra bomb (if not at maximum capacity). | ||
|} | |} | ||
*Grab-Bat | *Grab-Bat | ||
| Line 164: | Line 174: | ||
| | | | ||
{{Meteoid/Room|corner=Pipebrick.gif|left=Leftwall_pipe_door.gif|right=Rightwall_pipe_missiledoor.gif|top=ceiling_open.gif|bottom=ceiling_pipe_solid.gif|room1=Decor1_pipe_left.gif|room2=Decor1_pipe_right_m4.gif}} | {{Meteoid/Room|corner=Pipebrick.gif|left=Leftwall_pipe_door.gif|right=Rightwall_pipe_missiledoor.gif|top=ceiling_open.gif|bottom=ceiling_pipe_solid.gif|room1=Decor1_pipe_left.gif|room2=Decor1_pipe_right_m4.gif}} | ||
|Grab-Bats do 25 energy damage and have 45 energy. | |Grab-Bats do 25 energy damage and have 45 energy. They will drop either credcrystals, replenish some energy or drop an extra missle (if not at maximum capacity). | ||
|} | |} | ||
*Crabhopper | *Crabhopper | ||
| Line 171: | Line 181: | ||
| | | | ||
{{Meteoid/Room|corner=Pipebrick.gif|left=Leftwall_pipe_door.gif|right=Rightwall_pipe_missiledoor.gif|top=ceiling_open.gif|bottom=ceiling_open.gif|room1=Decor3_pipe_left.gif|room2=Decor3_pipe_right_m5.gif}} | {{Meteoid/Room|corner=Pipebrick.gif|left=Leftwall_pipe_door.gif|right=Rightwall_pipe_missiledoor.gif|top=ceiling_open.gif|bottom=ceiling_open.gif|room1=Decor3_pipe_left.gif|room2=Decor3_pipe_right_m5.gif}} | ||
|Crabhoppers do 35 energy damage and have 55 energy. | |Crabhoppers do 35 energy damage and have 55 energy. They will drop either credcrystals, replenish some energy, drop an extra bomb or drop an extra missle (if not at maximum capacity). | ||
|} | |} | ||
*Meteoid | *Meteoid | ||
| Line 178: | Line 188: | ||
| | | | ||
{{Meteoid/Room|corner=Pipebrick.gif|left=Leftwall_pipe_door.gif|right=Rightwall_pipe_missiledoor.gif|top=ceiling_open.gif|bottom=ceiling_open.gif|room1=Decor2_pipe_left.gif|room2=Decor2_pipe_right_m6.gif}} | {{Meteoid/Room|corner=Pipebrick.gif|left=Leftwall_pipe_door.gif|right=Rightwall_pipe_missiledoor.gif|top=ceiling_open.gif|bottom=ceiling_open.gif|room1=Decor2_pipe_left.gif|room2=Decor2_pipe_right_m6.gif}} | ||
|Meteoids do 35 energy damage and have 100 energy. | |Meteoids do 35 energy damage and have 100 energy. They will replenish some energy. | ||
|} | |} | ||
*Cerebral Matriarch | *Cerebral Matriarch | ||
| Line 185: | Line 195: | ||
| | | | ||
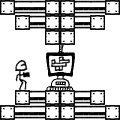
{{Meteoid/Room|corner=Pipebrick.gif|left=Leftwall_pipe_door.gif|right=Rightwall_pipe_solid.gif|top=ceiling_pipe_solid.gif|bottom=ceiling_pipe_solid.gif|room=Motherbrain.gif}} | {{Meteoid/Room|corner=Pipebrick.gif|left=Leftwall_pipe_door.gif|right=Rightwall_pipe_solid.gif|top=ceiling_pipe_solid.gif|bottom=ceiling_pipe_solid.gif|room=Motherbrain.gif}} | ||
|The Cerebral Matriarch does 50 energy damage and has 300 energy. | |The Cerebral Matriarch does 50 energy damage and has 300 energy. It is only damaged by missiles. Defeating this will cause you to win the game. The Matriach's room is always entered from the left, and is always behind a locked door. | ||
|} | |} | ||
==Game Over== | |||
''If you ran out of energy'': | |||
{{Meteoid/Message|Darkness crept into my vision as my suit's life support systems failed. My last thought was "How am I continuing to narrate this?"}} | |||
''Takes you to [[Meteoid/Score|Game Over]]''. | |||
---- | |||
''If you defeated The Cerebral Matriarch'': | |||
{{Meteoid/Message|{{NeedsText}}}} | |||
''Takes you to [[Meteoid/Score|Game Over]]''. | |||
==References== | ==References== | ||
| Line 193: | Line 212: | ||
:*Rocketsnails are based off of [http://metroid.wikia.com/wiki/Ripper Rippers]. | :*Rocketsnails are based off of [http://metroid.wikia.com/wiki/Ripper Rippers]. | ||
:*Snugglecrawlers are some previously unknown member of the [http://metroid.wikia.com/wiki/Zoomer Zoomber]/[http://metroid.wikia.com/wiki/Geemer Geemer] family. | :*Snugglecrawlers are some previously unknown member of the [http://metroid.wikia.com/wiki/Zoomer Zoomber]/[http://metroid.wikia.com/wiki/Geemer Geemer] family. | ||
:*Shriekwings are based off of the [http://metroid.wikia.com/wiki/Skree Skree] or their | :*Shriekwings are based off of the [http://metroid.wikia.com/wiki/Skree Skree] or their counterpart in the Metroid Prime trilogy, [http://metroid.wikia.com/wiki/Shriekbat Shriekbats] | ||
:*Eyeslugs are remarkably similar to the [http://metroid.wikia.com/wiki/Zeela Zeela]. | :*Eyeslugs are remarkably similar to the [http://metroid.wikia.com/wiki/Zeela Zeela]. | ||
:*Grab-bats are a version of the [http://metroid.wikia.com/wiki/Reo Reos]. | :*Grab-bats are a version of the [http://metroid.wikia.com/wiki/Reo Reos]. | ||
| Line 199: | Line 218: | ||
:*Meteoids are obviously [http://metroid.wikia.com/wiki/Metroid_%28species%29 Metroids] | :*Meteoids are obviously [http://metroid.wikia.com/wiki/Metroid_%28species%29 Metroids] | ||
:*A better name for Cerebral Matriarch might be [http://metroid.wikia.com/wiki/Mother_Brain Mother Brain] | :*A better name for Cerebral Matriarch might be [http://metroid.wikia.com/wiki/Mother_Brain Mother Brain] | ||
[[Category:Arcade Games]] | |||
Latest revision as of 23:32, 30 January 2025

|
This page is in need of content.
|
- Entering with more than one teleport charge remaning:
|
- Entering with only one teleport charge brings you to an area where you lose 5 energy points per move:
|
|
Occurs when selecting Teleport to Underground Complex from the bridge.
Overview
Within the underground you can explore a (randomized) 5x5 map. In each cell you can attempt to move in 4 directions, fire weapons, or perhaps activate an item.
Controls
You can move in four different directions, provided you are able to move in that direction.
Shoot is your basic attack. It does 10 damage by default, and costs nothing to use.
Bombs deal 25 damage by default, and stun the enemy. They also blast open secret passages beneath you. Bombs do not work on the Cerebral Matriarch.
Missiles deal 100 damage, enough to kill all enemies except the Cerebral Matriarch. They also open locked (white) doors.
You are able to skip past enemies, but they will deal damage.
On the minimap, enemies are marked by an E, artifacts are marked by a T, charge stations are marked by a C, map data terminals are marked by an M and the exit teleporter is marked by an X. Missile doors are shown as a thin vertical line. Blastable floors will not be marked by the minimap, but will always be in the 'rocky' rooms.
Map Notes
The Exit, Map, and Recharge rooms will always be accessable (not behind missile-doors), and there will always be one of each per level except the last.
The final level has a Map and Recharge room, but no exit, instead having the Cerebral Matriarch. The first two will be 'open', while the Matriarch will require a missile door to be opened. The final level also does not have treasure rooms.
There are no bombable floors beneath map stations, charge stations, teleporters or start points.
Map Features
- Doors:
|
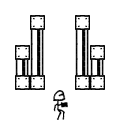
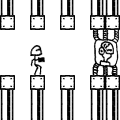
Dark doors (as on the left) are open; empty doors (as on the right) are locked. Locked doors can be opened by firing missiles. Missile doors are shown by a thinner solid line on the map. |
- Rocketsnails:
|
Banging into rocketsnails costs you 5 energy. You must have the Ice Beam to move by them. |
- The charging room:
|
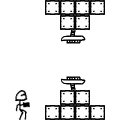
In the charging room you can replenish you missiles and bombs (once). Charging rooms are marked on your map with a "C". |
- The map room:
|
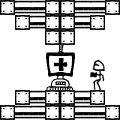
Activating this device will fill in your map. Besides the layout, the charging room and exit room will be marked. If you already have the visor upgrade, enemies and treasure will also be marked. |
- The exit room:
|
From the exit room you can leave the underground and teleport back to your ship. They are always entered from the left. Exit rooms are marked on your map with an "X" |
- The treasure room:
|
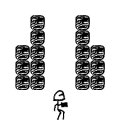
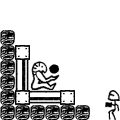
In the treasure room you can receive a number of Credcrystals, an upgrade to your suit, or an extra charge for your ship teleport system. They are marked on your map with a "T". |
Treasures
- Credcrystals, ~100 for rocketsnail access, 250-350 for bomb/missile, ~500 for RS+B/M, and <800 for many B/Ms
- Visor Upgrade - Shows monster's energy, and provides more detail in the map room. Almost always obtained in the 1st or 2nd level.
- Armor Upgrade - Reduces damage from monsters by 25%, rounded up.
- Gun Upgrade - Raises gun damage by 10.
- Bomb Upgrade - Doubles bomb damage to 50.
- Extra Teleport - Allows you to visit one more underground complex. Can only be obtained in the 4th level.
Monsters
- Snugglecrawler
|
Snugglecrawlers do 5 energy damage and have 15 energy. They will drop either credcrystals or replenish some energy. |
- Shriekwing:
|
Shriekwings do 10 energy damage and have 25 energy. They will drop either credcrystals or replenish some energy. |
- Eyeslug
|
Eyeslugs do 15 energy damage and have 35 energy. They will drop either credcrystals, replenish some energy or drop an extra bomb (if not at maximum capacity). |
- Grab-Bat
|
Grab-Bats do 25 energy damage and have 45 energy. They will drop either credcrystals, replenish some energy or drop an extra missle (if not at maximum capacity). |
- Crabhopper
|
Crabhoppers do 35 energy damage and have 55 energy. They will drop either credcrystals, replenish some energy, drop an extra bomb or drop an extra missle (if not at maximum capacity). |
- Meteoid
|
Meteoids do 35 energy damage and have 100 energy. They will replenish some energy. |
- Cerebral Matriarch
|
The Cerebral Matriarch does 50 energy damage and has 300 energy. It is only damaged by missiles. Defeating this will cause you to win the game. The Matriach's room is always entered from the left, and is always behind a locked door. |
Game Over
If you ran out of energy:
|
Takes you to Game Over.
If you defeated The Cerebral Matriarch:
|
Takes you to Game Over.
References
- Everything in this game is based off of Metroid and its enemies.
- Treasure rooms feature statues based off of the Chozo.
- Rocketsnails are based off of Rippers.
- Snugglecrawlers are some previously unknown member of the Zoomber/Geemer family.
- Shriekwings are based off of the Skree or their counterpart in the Metroid Prime trilogy, Shriekbats
- Eyeslugs are remarkably similar to the Zeela.
- Grab-bats are a version of the Reos.
- Crabhoppers are a version of the Sidehopper.
- Meteoids are obviously Metroids
- A better name for Cerebral Matriarch might be Mother Brain
