Meteoid/Underground: Difference between revisions
From A KoL Wiki
imported>Fig bucket m →Monsters: Crabhopper |
imported>Fig bucket mNo edit summary |
||
| Line 10: | Line 10: | ||
---- | ---- | ||
Within the underground you can explore a 5x5 map. In each cell you can attempt to move in 4 directions | Within the underground you can explore a (randomized) 5x5 map. In each cell you can attempt to move in 4 directions, fire weapons, or perhaps activate an item. The first 4 journeys begin in the same room: | ||
{| width="100%" | {| width="100%" | ||
| Line 19: | Line 19: | ||
| | | | ||
{{Meteoid/Room}} | {{Meteoid/Room}} | ||
|<font size="-1">'''Energy:''' 100<br>'''Bombs:''' 1<br>'''Missiles:''' 1<br>'''Credcrystals:''' 0</font><center><font size="-1">'''Map:'''< | |<font size="-1">'''Energy:''' 100<br>'''Bombs:''' 1<br>'''Missiles:''' 1<br>'''Credcrystals:''' 0</font><center><font size="-1">'''Map:'''</font></center> | ||
{{Meteoid/Map}} | {{Meteoid/Map}} | ||
|} | |} | ||
| Line 54: | Line 54: | ||
|} | |} | ||
|} | |} | ||
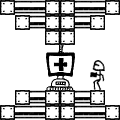
The 5th journey is to an area where you lose 5 energy points per move: | |||
{{Meteoid/Message|I was down to my last teleportation charge. I steeled my nerves, set the coordinates to the dead center of the underground complex, and took the plunge. | |||
The room I found myself in was different from the others -- lined completely in metal, and hot! So hot my cybersuit's life support subsystems could barely maintain a survivable temperature. I resolved to finish this, one way or another.}} | |||
{| width="100%" | |||
|- | |||
| width="100%" align="center"| | |||
{| cellspacing="0" cellpadding="15" style="border: 1px solid black;" | |||
|- | |||
| | |||
{{Meteoid/Room|corner=Pipebrick.gif|left=Leftwall_pipe_solid.gif|right=Rightwall_pipe_door.gif|top=ceiling_pipe_solid.gif|bottom=ceiling_pipe_solid.gif|room=Startroom_pipe.gif}} | |||
|<font size="-1">'''Energy:''' 100<br>'''Bombs:''' 1<br>'''Missiles:''' 1<br>'''Credcrystals:''' 0</font><br><center><font size="-1">'''Map:'''</font></center> | |||
{{Meteoid/Map}} | |||
|} | |||
|} | |||
==Map Features== | ==Map Features== | ||
Revision as of 18:28, 26 June 2010
- The first time:
- Subsequently:
Within the underground you can explore a (randomized) 5x5 map. In each cell you can attempt to move in 4 directions, fire weapons, or perhaps activate an item. The first 4 journeys begin in the same room:
|
The 5th journey is to an area where you lose 5 energy points per move:
|
|
Map Features
- Doors:
|
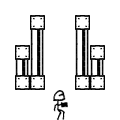
Dark doors (as on the left) are open; empty doors (as on the right) are locked. Locked doors can be opened by firing missiles. Missile doors are shown by a smaller width solid line on the map. |
- Rocketsnails:
|
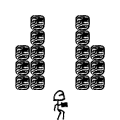
Banging into rocketsnails costs you 5 energy. You must have the Ice Beam to move by them. |
- The charging room:
|
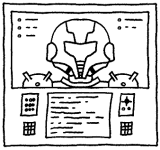
In the charging room you can replenish you missiles and bombs (once). Charging rooms are marked on your map with a "C". |
- The exit room:
|
From the exit room you can leave the underground and teleport back to your ship. Exit rooms are marked on your map with an "X" |
- The treasure room:
|
In the treasure room you can receive a number of Credcrystals or an upgrade to your suit. They are marked on your map with a "T". |
Monsters
- Snugglecrawler
|
Snugglecrawlers do 5 energy damage and have 15 energy. |
- Shriekwing:
|
Shriekwings do 10 energy damage and have 25 energy. |
- Eyeslug
|
Eyeslugs do 15 energy damage and have 35 energy. |
- Grab-Bat
|
Grab-Bats do 25 energy damage and have 45 energy. |
- Crabhopper
|
Crabhoppers do 35 energy damage and have 55 energy. |
