Tales of Spelunking (area): Difference between revisions
imported>Discordance |
imported>Discordance |
||
| Line 221: | Line 221: | ||
====Off-Hand==== | ====Off-Hand==== | ||
*[[crumbling skull]] (can be thrown) | *[[crumbling skull]] (can be thrown) | ||
*[[rock]] (can be thrown) | *[[rock (spelunky)|rock]] (can be thrown) | ||
*[[pot]] (can be thrown, 2 damage reduction) | *[[pot]] (can be thrown, 2 damage reduction) | ||
*[[torch]] (can be thrown, burns opponents, reveals secrets) | *[[torch]] (can be thrown, burns opponents, reveals secrets) | ||
Revision as of 16:12, 14 February 2015
The Spelunker Area is found via the Tales of Spelunking from the Adventurous Spelunker.
When first opening this area:
- Welcome to your Spelunking adventure! Try to find as much treasure as you can before the ghost arrives!
Your left sidebar is replaced with a display of new stats:
| Stats: | |
| Mus: | 30 |
| Mox: | 30 |
| HP: | 30 / 30 |
Last Spelunk:
???
Locations found here include:
- Best Spelunkers (daily leaderboard)
- Rest at Base Camp: Heals all HP. (You tend to your wounds at your base camp. You gain x hit points. The ghost draws nearer...)
- Exit
And various locations to explore (all except the Mines are unlocked as you go):
Strategy
Unlocking Areas
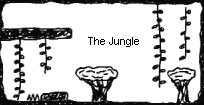
You begin with just The Mines available. Lower levels in the central section are unlocked by adventuring in the previous level, or through starting Perks.
Side areas are mainly unlocked by your choices in specific non-combat adventures in the adjoining central area. LOLmec's Lair, Hell, and Yomama's Throne have special unlocks.
| Location | Unlock |
|---|---|
| The Spider Hole | Use a rope in It's a Trap! A Dart Trap. |
| The Snake Pit | Use a bomb in It's a Trap! A Dart Trap. |
| The Ancient Burial Ground | Use a rope in It's a Trap! A Tiki Trap. |
| The Beehive | Use a bomb in It's a Trap! A Tiki Trap. |
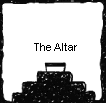
| The Altar | Kick the landmine in A Landmine |
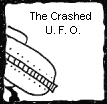
| The Crashed U. F. O. | Use 3 ropes in A Landmine |
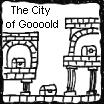
| The City of Goooold | Use a key in It's a Trap! A Smashy Trap. |
| LOLmec's Lair | Win one combat in the Temple Ruins after your 7th combat. |
| Hell | Use a key in LOLmec's Lair after defeating him, while wearing Bananubis's Staff, The Joke Book of the Dead, and The Clown Crown |
| Yomama's Throne | Win seven combats in the Hell? |
Non-combats
After every 3rd successful combat, the ghost waves its arms 
This indicates that the next adventure will result in a non-combat choice adventure. Each area presents different choices, with the 4 main locations giving 3 different choice adventures depending on the current phase. The phase of each area is the same, and is advanced after every choice adventure, cycling through 3 values.
Special Adventures
Each sub-area (except The Ancient Burial Ground) also has a special non-combat, which appears on your 6th-9th(?) adventure in that zone.
| Location | Special Adventure | Benefit |
|---|---|---|
| The Spider Hole | Fight the spider queen | All bombs are now "Sticky Bombs" (bomb image changes to |
| The Snake Pit | It's Lump. It's Lump. | Spend a bomb and acquire a heavy pickaxe |
| The Beehive | Fight the queen bee | Increase Maximum HP by 20 |
| The Crashed U. F. O. | Fight the alien queen | Acquire a plasma rifle and jetpack |
| The City of Goooold | Fight Bananubis | Acquire Bananubis's Staff |
Equipment
Weapons
- trusty whip
- sturdy machete (+5 weapon damage)
- shotgun (+10 ranged damage)
- boomerang (successful hit weakens opponents)
- heavy pickaxe (All attributes +5)
- plasma rifle (+20 ranged damage)
- Bananubis's Staff (-6 Luck, raises Skeleton buddies)
Off-Hand
- crumbling skull (can be thrown)
- rock (can be thrown)
- pot (can be thrown, 2 damage reduction)
- torch (can be thrown, burns opponents, reveals secrets)
- The Joke Book of the Dead (5 damage reduction, +5 Weapon Damage, -6 luck)
- cursed coffee cup (-2 luck, HP restores sometimes after combat)
Hats
- spelunking fedora (All Attributes +5)
- mining helmet (Damage Reduction 2, Lights Dark Places)
- X-ray goggles (Moxie -5, +5 Luck, Reveals Secrets)
- The Clown Crown (-6 luck)
Back Items
- yellow cape (Moxie +5)
- jetpack (Moxie +10)
Accessories
- spring boots (Sometimes avoid enemy attacks)
- spiked boots (Deals damage to opponents)
Perks
Each time you complete the game you can choose a perk that gives you a benefit in your next run, up to a maximum of 9 perks. Perks are organized into 3 branches, with choices presented in order in each branch.
- Branch 1
- Start with The Jungle unlocked
- Start with The Ice Caves unlocked
- Start with The Temple Ruins unlocked
- Branch 2
- Start with 3 bombs
- Shops have one more item
- Start with $100
- Branch 3
- Start with 3 ropes
- Start with a spelunking fedora (All Attributes +5)
- Start with a key
Notes
- The entire setting is a browser version of the game, Spelunky.


