Tavern Cellar: Difference between revisions
imported>Groli →Non-combat Adventures: added conditions for skipping the non-combats |
imported>Groli →Non-combat Adventures: linebreaks |
||
| Line 20: | Line 20: | ||
{{choice|name=1984 Had Nothing on This Cellar|image=crate_big.gif | {{choice|name=1984 Had Nothing on This Cellar|image=crate_big.gif | ||
|choice1name=Dump out the crate.|choice1=3-5 {{plural|rat whisker}}, [[smiling rat]] (first time)|choice2name=Stink them out|choice2=Get rid of the crate without spending an adventure ''(With +20 {{element|Stench}})''}} | |choice1name=Dump out the crate.|choice1=3-5 {{plural|rat whisker}}, [[smiling rat]] (first time)|choice2name=Stink them out|choice2=Get rid of the crate without spending an adventure<br>''(With +20 {{element|Stench}})''}} | ||
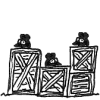
{{choice|name=A Rat's Home...|image=ratcastle.gif | {{choice|name=A Rat's Home...|image=ratcastle.gif | ||
|choice1name=Kick over the castle|choice1=3 {{plural|bottle of tequila}}|choice2name=Scare them off|choice2=Get rid of the castle without spending an adventure ''(With +20 {{element|Spooky}})''}} | |choice1name=Kick over the castle|choice1=3 {{plural|bottle of tequila}}|choice2name=Scare them off|choice2=Get rid of the castle without spending an adventure<br>''(With +20 {{element|Spooky}})''}} | ||
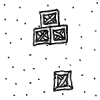
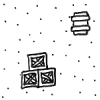
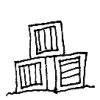
{{choice|name=Crate Expectations (Tavern Cellar){{!}}Crate Expectations|image=crates.gif|choice1name=Smash the crates|choice1=gain 3 of the following: [[bottle of gin]], [[bottle of rum]], [[bottle of vodka]], [[bottle of whiskey]], [[boxed wine]]|choice2name=Burn the crates|choice2=Get rid of the crates without spending an adventure ''(With +20 {{element|Hot}})''}} | {{choice|name=Crate Expectations (Tavern Cellar){{!}}Crate Expectations|image=crates.gif|choice1name=Smash the crates|choice1=gain 3 of the following: [[bottle of gin]], [[bottle of rum]], [[bottle of vodka]], [[bottle of whiskey]], [[boxed wine]]|choice2name=Burn the crates|choice2=Get rid of the crates without spending an adventure<br>''(With +20 {{element|Hot}})''}} | ||
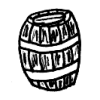
{{choice|name=Staring Down the Barrel|image=barrel.gif | {{choice|name=Staring Down the Barrel|image=barrel.gif | ||
|choice1name=Smash the barrel|choice1=3-5 {{plural|ice-cold Willer}}|choice2name=Freeze the Barrel|choice2=Get rid of the barrel without spending an adventure ''(With +20 {{element|Cold}})''}} | |choice1name=Smash the barrel|choice1=3-5 {{plural|ice-cold Willer}}|choice2name=Freeze the Barrel|choice2=Get rid of the barrel without spending an adventure<br>''(With +20 {{element|Cold}})''}} | ||
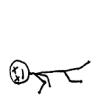
{{choice|name=Those Who Came Before You|image=corpse.gif | {{choice|name=Those Who Came Before You|image=corpse.gif | ||
Revision as of 16:23, 6 July 2011
There are some vague or non-exact figures and information on this page. Some spading is required.
|
|
|
|
|
|

|

|

|

|

|
|

|

|

|

|

|

|

|

|

|

|

|
|
|

|
The Tavern Cellar can be found in The Typical Tavern by visiting the Tavern Cellar in the corner of the tavern.
Attempting to enter prior to talking to Bart Ender results in the text:
- "You should probably talk to the bartender before you go poking around in the cellar."
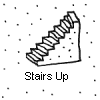
The cellar consists of 24 squares of "darkness" and one square containing the stairs up. The player may proceed one square horizontally or vertically from any square already uncovered for 1 adventure, uncovering that square.
The combats you encounter are influenced by how much you have increased monster level. With no monster level increasers you will fight only drunken rats, while with an extremely high level only rat kings will appear.
Combat Adventures
| drunken rat | |
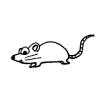
|
|
| bunch of drunken rats | |
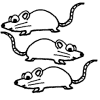
|
|
| drunken rat king | |
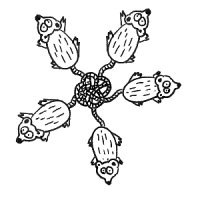
|
|
Non-combat Adventures
| 1984 Had Nothing on This Cellar | |
|
|
| A Rat's Home... | |
|
|
| Crate Expectations | |
|
|
| Staring Down the Barrel | |
|
|
| Those Who Came Before You | |
|
|
| Of Course! | |
|
|
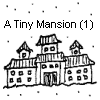
| If it's Tiny, is it Still a Mansion? | |
|
|
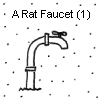
| Hot and Cold Running Rats | |

|
|
About square distribution
Three squares are considered special: the corpse, the Faucet, and the Baron's mansion. There are three regions of note, labeled A, B, and C below.
A x x x x
A x x x x
A x x x x
B B x x x
B B C C C
One square in each region is one of the special squares. The first special square you encounter will be the corpse, the second the Faucet, and the third the mansion. [1]
