The Daily Dungeon: Difference between revisions
imported>TechSmurf Choice adventure'd the locked door |
imported>TechSmurf I made it beautiful! |
||
| Line 1: | Line 1: | ||
[[image:Dungeon2.gif|center]] | [[image:Dungeon2.gif|center]] | ||
[[The Daily Dungeon]] can be found inside [[The Dungeon Full Of Dungeons]] in the [[Seaside Town]]. If your main stat isn't high enough, you will see the message: | |||
:"You approach the entrance to the Daily Dungeon, and feel a strange sensation in your midsection. The sensation spreads throughout your entire body, and when it finally gets to your nose, you recognize it by its smell -- fear. | :"You approach the entrance to the Daily Dungeon, and feel a strange sensation in your midsection. The sensation spreads throughout your entire body, and when it finally gets to your nose, you recognize it by its smell -- fear. | ||
:"You're not really tough enough to mess around here yet. Come back when you've got 15 <stat>." | :"You're not really tough enough to mess around here yet. Come back when you've got 15 <stat>." | ||
Once per day, you can traverse the ten rooms of the dungeon. The third, sixth, and tenth rooms have rewards for your courage, while the rest contain monsters or tests of your skill and elemental resistance. | |||
Without sufficient stats, you will fail the stat tests. Information on the stats required to pass these tests can be found in [[Daily Dungeon Stat Tests]]. Elemental tests, meanwhile, can be passed with any level of resistance in the required element. See [[Elemental Resistance]] for a list of all the ways of acquiring resistance. Without resistance, you can still progress, but you will lose all your HP and be [[beaten up]]. | |||
==Monsters== | |||
{{Combat|name=apathetic lizardman|drops=none|meat=23|stat=3|image=Lizardman.gif|level=20?|hp=12?|element=none}} | {{Combat|name=apathetic lizardman|drops=none|meat=23|stat=3|image=Lizardman.gif|level=20?|hp=12?|element=none}} | ||
Potential effect: [[Apathy]] (10 Adventures). Effect may be avoided by using a combat item or certain skills to kill. | *Potential effect: [[Apathy]] (10 Adventures). Effect may be avoided by using a combat item or certain skills to kill. | ||
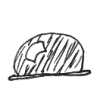
{{Combat|name=dairy ooze|drops=none|meat=11-15|stat=2-3|element=none|image=Ooze.gif|level=13|hp=8}} | {{Combat|name=dairy ooze|drops=none|meat=11-15|stat=2-3|element=none|image=Ooze.gif|level=13|hp=8}} | ||
| Line 33: | Line 28: | ||
{{Combat|name=vampire clam|drops=none|meat=18-22|stat=4|image=Vampclam.gif|level=21|hp=14|element=none}} | {{Combat|name=vampire clam|drops=none|meat=18-22|stat=4|image=Vampclam.gif|level=21|hp=14|element=none}} | ||
==Stat Tests== | |||
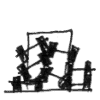
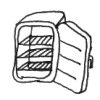
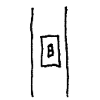
{{choice|name=Locked Door|image=dungdoor.gif | |||
|choice1name=Force the Door Open|choice1=Hard main stat test | |||
|choice2name=Use a Skeleton Key|choice2=Successfully unlocks the door every time (breaks the key most times), no adventure cost. | |||
|choice3name=Try to Pick the Lock|choice3=Hard Moxie test, no adventure cost. | |||
|choice4name=Try The Yendium Platnori... Whatever On It|choice4=Successfully unlocks the door every time, no adventure cost. | |||
|note1=The choice to use a [[skeleton key]] only appears when you have one in your inventory. | |||
|note2=The choice to pick the lock only appears when you have a [[Pick-O-Matic lockpicks]] | |||
|note3=The choice to use the [[Platinum Yendorian Express Card]] only appears when you have one in your inventory. }} | |||
{{ | {{Choice|name=Piledriver|choice1name=Move 'em Out|choice1=Hard Muscle test|image=Barbells.gif}} | ||
{{ | {{Choice|name=Yet Another Troll|choice1name=Wrestle|choice1=Medium Muscle test|image=Troll.gif}} | ||
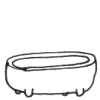
{{ | {{Choice|name=The Biggest Bathtub Ever|choice1name=Push it Real Good|choice1=Easy Muscle test|image=bathtub.gif}} | ||
{{ | {{Choice|name=A Hairier Barrier|choice1name=Dispel the Barrier|choice1=Hard Mysticality test|image=hairwall.gif}} | ||
{{ | {{Choice|name=The Mystic Seal|choice1name=Smoke that Seal|choice1=Medium Mysticality test|image=Sealball.gif}} | ||
{{ | {{Choice|name=Magic Shell|choice1name=Dispel the Shell|choice1=Easy Mysticality test|image=Magicshell.gif}} | ||
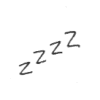
{{ | {{Choice|name=Smooth Criminal|choice1name=Hork the Keys|choice1=Hard Moxie test|image=zzs.gif}} | ||
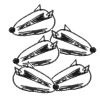
{{ | {{Choice|name=Badger Badger Badger Badger|choice1name=Sneakily Sneak (A Snake!)|choice1=Medium Moxie test|image=Badgers.gif}} | ||
{{ | {{Choice|name=Dungeon Fever|choice1name=Bust a Move|choice1=Easy Moxie test|image=Tilefloor.gif}} | ||
==Elemental Tests== | |||
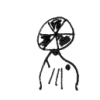
{{Choice|name=Brrrrrr.|choice1name=Walk on By|choice1=Deals {{element|Cold}} unless you have {{element|Cold|Resistance}}.|image=fridge.gif}} | |||
{{ | {{Choice|name=You'll Put Your Eye Out|choice1name=I TRIPLE dog-dare ya!|choice1=Deals {{element|Cold}} unless you have {{element|Cold|Resistance}}|image=poleswitch.gif}} | ||
{{ | {{Choice|name=Blister in the Sun|choice1name=Soak Up Some Rays|choice1=Deals {{element|Hot}} unless you have {{element|Hot|Resistance}}|image=bigmag.gif}} | ||
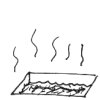
{{ | {{Choice|name=Did I Leave the Floor On?|choice1name=Traverse the Hot Hot Floor|choice1=Deals {{element|Hot}} unless you have {{element|Hot|Resistance}}|image=burner.gif}} | ||
{{ | {{Choice|name=Giant Creepy Floating Skull|choice1name=Move Past the Skull|choice1=Deals {{element|Spooky}} unless you have {{element|Spooky|Resistance}}.|image=giantskull.gif}} | ||
{{ | {{Choice|name=The Night Gallery|choice1name=Take the Tour|choice1=Deals {{element|Spooky}} unless you have {{element|Spooky|Resistance}}.|image=nopic.gif}} | ||
{{ | {{Choice|name=Sewage Moat|choice1name=Jump the Moat|choice1=Deals {{element|Stench}} unless you have {{element|Stench|Resistance}}.|image=sewermoat.gif}} | ||
{{ | {{Choice|name=The Warehouse of Eternal Stench|choice1name=Smell Baaad!|choice1=Deals {{element|Stench}} unless you have {{element|Stench|Resistance}}.|image=bigstench.gif}} | ||
{{ | {{Choice|name=Seriously, I Just Read It For the Articles|choice1name=Perambulate Past the Periodicals|choice1=Deals {{element|Sleaze}} unless you have {{element|Sleaze|Resistance}}.|image=mags.gif}} | ||
{{ | {{Choice|name=You Schmooze, You Lose|choice1name=Hop the Moat|choice1=Deals {{element|Sleaze}} unless you have {{element|Sleaze|Resistance}}.|image=greasemoat.gif}} | ||
==Treasure Rooms== | |||
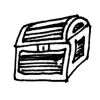
{{choice|name=Room 3: Treasure!|choice1name=Open It|choice1=[[extra-strength strongness elixir]] or [[jug-o-magicalness]] or [[potato sprout]] or [[rubber axe]] or [[skeleton key]] or [[suntan lotion of moxiousness]] or [[walrus-tusk earring]]|image=chest.gif|choice2name=Move On|choice2=Go to the next room. (Does not cost an adventure.)}} | |||
{{ | {{choice|name=Room 6: Treasure!|choice1name=Open It|choice1=[[can of maces]] or [[concentrated magicalness pill]] or [[enchanted barbell]] or [[giant moxie weed]] or [[Pick-O-Matic lockpicks]] or [[ring of half-assed regeneration]] or [[skeleton key ring]]|choice2name=Move On|choice2=Go to the next room. (Does not cost an adventure.)|image=chest.gif}} | ||
{{ | {{choice|name=Room 10: Treasure!|choice1name=Open It|choice1=[[Boris's key]] or [[Boris's ring]] or [[Jarlsberg's earring]] or [[Jarlsberg's key]] or [[Sneaky Pete's breath spray]] or [[Sneaky Pete's key ]]|image=chest.gif}} | ||
==Notes== | ==Notes== | ||
Revision as of 03:10, 23 July 2007

The Daily Dungeon can be found inside The Dungeon Full Of Dungeons in the Seaside Town. If your main stat isn't high enough, you will see the message:
- "You approach the entrance to the Daily Dungeon, and feel a strange sensation in your midsection. The sensation spreads throughout your entire body, and when it finally gets to your nose, you recognize it by its smell -- fear.
- "You're not really tough enough to mess around here yet. Come back when you've got 15 <stat>."
Once per day, you can traverse the ten rooms of the dungeon. The third, sixth, and tenth rooms have rewards for your courage, while the rest contain monsters or tests of your skill and elemental resistance.
Without sufficient stats, you will fail the stat tests. Information on the stats required to pass these tests can be found in Daily Dungeon Stat Tests. Elemental tests, meanwhile, can be passed with any level of resistance in the required element. See Elemental Resistance for a list of all the ways of acquiring resistance. Without resistance, you can still progress, but you will lose all your HP and be beaten up.
Monsters
| apathetic lizardman | |

|
|
- Potential effect: Apathy (10 Adventures). Effect may be avoided by using a combat item or certain skills to kill.
| dairy ooze | |
|
|
| dodecapede | |
|
|
| giant giant moth | |
|
|
| mayonnaise wasp | |
|
|
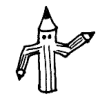
| pencil golem | |
|
|
| sabre-toothed lime | |

|
|
| tonic water elemental | |
|
|
| vampire clam | |
|
|
Stat Tests
| Locked Door | |
|
|
| Piledriver | |
|
|
| Yet Another Troll | |

|
|
| The Biggest Bathtub Ever | |
|
|
| A Hairier Barrier | |
|
|
| The Mystic Seal | |
|
|
| Magic Shell | |
|
|
| Smooth Criminal | |
|
|
| Badger Badger Badger Badger | |
|
|
| Dungeon Fever | |

|
|
Elemental Tests
| Brrrrrr. | |
|
|
| You'll Put Your Eye Out | |
|
|
| Blister in the Sun | |

|
|
| Did I Leave the Floor On? | |
|
|
| Giant Creepy Floating Skull | |

|
|
| The Night Gallery | |
|
|
| Sewage Moat | |
|
|
| The Warehouse of Eternal Stench | |
|
|
| Seriously, I Just Read It For the Articles | |

|
|
| You Schmooze, You Lose | |
|
|
Treasure Rooms
| Room 3: Treasure! | |
|
|
| Room 6: Treasure! | |
|
|
|
| Room 10: Treasure! | |
|
|
|
Notes
- The dungeon is unusual in that, like Fernswarthy's Basement, you first get the chance to see what your upcoming opponent/skill test is without having to automatically enter that adventure.
- Attempting to adventure here while Beaten Up yields the message:
- You're too beaten up to screw around in a dungeon.
- Attempting to adventure here while falling down drunk yields the message:
- You're too drunk to spelunk, as it were.

