Basement Diving Guide

|
Data on this page needs confirmation.
|
For Loathers wanting to do a basement dive to upgrade their telescopes, the present article aims to provide strategies for doing so efficiently. While the focus will be on reaching floor 500, the strategies will also be applicable for those who want to go beyond.
Challenge Overview
Fernswarthy's Basement consists of several different types of challenges, which get more and more difficult the deeper into the basement one goes. Every fifth level is a reward (usually a stat reward, whose magnitude scales to your main stat).
Combat Challenges
Monster Level in the basement scales roughly as twice the basement level (BL) to the 1.4th power. That is,
ML = 2 × BL1.4
| Monster | Notes |
|---|---|
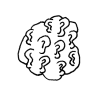 The Beast with n Ears |
|
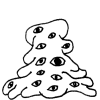 The Beast with n Eyes |
|
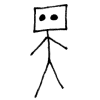 A n Stone Golem |
|
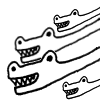 A n-Headed Hydra |
|
 The Ghost of Fernswarthy's n great-grandfather |
|
 n Bottles of Beer on a Golem |
|
 A n-Dimensional Horror |
|
Elemental Challenges
There are five different Elemental Resistance challenges, which test two elements at once. The same amount of damage is done in both elements; failure results if HP is reduced to 0. As with the combat challenges, the damage scales with basement level:
Elt = 4.48 × BL1.4 + 8
To repeat, the above damage is applied using both elements of the test, so the total raw damage is twice the calculated value. Additionally, there appears to be about a 5% variation in the equation, so having exactly enough HP and resistance to survive the damage indicated does not guarantee the test will be passed. This also means that it is possible to pass the tests with fewer HP than implied by the equation. Note that the elemental powder potions' effects (e.g., coldform) force elemental damage rules to be followed, so that one of the two prongs (the elemental forms cannot stack) of each test can be reduced to one point of damage. However, care must be taken to choose the form which won't double the damage received from the other prong. Damage Absorption has no effect on these challenges.
| Elemental Test | Elements | Optimal Elemental Form |
|---|---|---|
 Singled Out |
cold and sleaze | Coldform (phial of coldness) |
 Peace, Bra |
sleaze and stench | Sleazeform (phial of sleaziness) |
 Still Better Than Pistachio |
stench and hot | Stenchform (phial of stench) |
 Unholy Writes |
hot and spooky | Hotform (phial of hotness) |
 The Unthawed |
spooky and cold | Spookyform (phial of spookiness) |
Attribute Tests
The remaining challenges are passed or failed based on buffed Muscle, Mysticality, Moxie, HP, or MP.
The stat tests are thought to scale as:
Stat = BL1.4 + 2
The HP test probably scales like:
Phys = 10 × BL1.4
The MP test likely scales as:
Drain = 1.67 × BL1.4
It is believed that like the elemental tests, all attribute tests have a 5% variation.
| Attribute Test | Notes | ||
|---|---|---|---|
 Lift 'em! |
 Push it Real Good |
 Ring that Bell |
Muscle tests |
 Gathering: The Magic |
 Mop the Floor with the Mops |
 Do away with the 'doo |
Mysticality tests |
 Don't Wake the Baby |
 Grab a cue |
  Put on the Smooth Moves |
Moxie tests |
 Throwin' Down the Gauntlet |
| ||
 A Festering Powder |
| ||
Number-Crunching
Assuming that the combat challenges can be handled, the major hurdle for divers will be the non-combat tests. The question of whether basement diving is feasible can be asked in two related ways:
- How much damage is done/how big do player attributes have to be to pass the non-combat tests at a given basement level?
- Knowing the stat/damage results, what main stat will be required to reach a particular basement level, given the buffs a player is willing to run at all times?
Table of Test Strengths
Knowing the approximate values of the tests as discussed in the outline, it is useful to have a reference of the stat strength/damage done at several common stat levels.
The following table calculates two series of numbers for every 25th level of the basement. The first set of numbers is the requirement/damage done for the equations as listed in the overview; the second pads using a 5% safety margin. The HP test is calculated at 0% DA, 60% DA (easily achievable with the armor parts of the Antique Arms And Armor outfit, plus publicly available TT buffs Astral Shell and Ghostly Shell), and 90% DA (which requires Tao of the Terrapin). Elemental damage is calculated at the 0%, 60%, and 80% levels, assuming a powder potion has been imbibed to reduce the optimal element to one point of damage -- hence the number listed is the expected damage under the appropriate resistance for the unpowdered element.
| BL | Stat | Phys (0% DA) |
Phys (60% DA) |
Phys (90% DA) |
Drain | Elt (0% Res) |
Elt (60% Res) |
Elt (80% Res) |
|---|---|---|---|---|---|---|---|---|
| 24 | 88 | 856 | 343 | 86 | 143 | 392 | 157 | 79 |
| 24 (5% padding) |
92 | 899 | 360 | 90 | 151 | 411 | 165 | 83 |
| 49 | 235 | 2325 | 930 | 233 | 389 | 1050 | 420 | 210 |
| 49 (5% padding) |
247 | 2441 | 977 | 245 | 408 | 1102 | 441 | 221 |
| 74 | 416 | 4140 | 1656 | 414 | 692 | 1863 | 745 | 373 |
| 74 (5% padding) |
437 | 4347 | 1739 | 435 | 726 | 1956 | 783 | 392 |
| 99 | 625 | 6222 | 2489 | 623 | 1039 | 2796 | 1119 | 560 |
| 99 (5% padding) |
656 | 6533 | 2613 | 654 | 1091 | 2935 | 1174 | 587 |
| 124 | 855 | 8527 | 3411 | 853 | 1424 | 3829 | 1532 | 766 |
| 124 (5% padding) |
898 | 8954 | 3582 | 896 | 1496 | 4020 | 1608 | 804 |
| 149 | 1105 | 11028 | 4411 | 1103 | 1842 | 4949 | 1980 | 990 |
| 149 (5% padding) |
1160 | 11579 | 4632 | 1158 | 1934 | 5196 | 2079 | 1040 |
| 174 | 1373 | 13702 | 5481 | 1371 | 2289 | 6147 | 2459 | 1230 |
| 174 (5% padding) |
1441 | 14387 | 5755 | 1439 | 2403 | 6454 | 2582 | 1291 |
| 199 | 1656 | 16535 | 6614 | 1654 | 2762 | 7416 | 2967 | 1484 |
| 199 (5% padding) |
1739 | 17362 | 6945 | 1737 | 2900 | 7787 | 3115 | 1558 |
| 224 | 1954 | 19515 | 7806 | 1952 | 3259 | 8751 | 3501 | 1751 |
| 224 (5% padding) |
2052 | 20490 | 8196 | 2049 | 3422 | 9188 | 3676 | 1838 |
| 249 | 2265 | 22630 | 9052 | 2263 | 3780 | 10147 | 4059 | 2030 |
| 249 (5% padding) |
2379 | 23762 | 9505 | 2377 | 3969 | 10654 | 4262 | 2131 |
| 274 | 2590 | 25874 | 10350 | 2588 | 4321 | 11600 | 4640 | 2320 |
| 274 (5% padding) |
2719 | 27167 | 10867 | 2717 | 4537 | 12180 | 4872 | 2436 |
| 299 | 2926 | 29238 | 11695 | 2924 | 4883 | 13107 | 5243 | 2622 |
| 299 (5% padding) |
3073 | 30700 | 12280 | 3070 | 5127 | 13762 | 5505 | 2753 |
| 324 | 3274 | 32717 | 13087 | 3272 | 5464 | 14665 | 5866 | 2933 |
| 324 (5% padding) |
3438 | 34353 | 13741 | 3436 | 5737 | 15399 | 6160 | 3080 |
| 349 | 3633 | 36305 | 14522 | 3631 | 6063 | 16273 | 6509 | 3255 |
| 349 (5% padding) |
3815 | 38120 | 15248 | 3812 | 6366 | 17086 | 6835 | 3418 |
| 374 | 4002 | 39997 | 15999 | 4000 | 6680 | 17927 | 7171 | 3586 |
| 374 (5% padding) |
4202 | 41997 | 16799 | 4200 | 7014 | 18823 | 7530 | 3765 |
| 399 | 4381 | 43789 | 17516 | 4379 | 7313 | 19626 | 7851 | 3926 |
| 399 (5% padding) |
4600 | 45979 | 18392 | 4598 | 7679 | 20607 | 8243 | 4122 |
| 424 | 4770 | 47678 | 19071 | 4768 | 7963 | 21368 | 8547 | 4274 |
| 424 (5% padding) |
5009 | 50062 | 20025 | 5007 | 8361 | 22436 | 8975 | 4488 |
| 449 | 5168 | 51659 | 20664 | 5166 | 8628 | 23152 | 9261 | 4631 |
| 449 (5% padding) |
5427 | 54242 | 21697 | 5425 | 9059 | 24309 | 9724 | 4862 |
| 474 | 5576 | 55731 | 22293 | 5574 | 9307 | 24976 | 9991 | 4996 |
| 474 (5% padding) |
5854 | 58517 | 23407 | 5852 | 9773 | 26224 | 10490 | 5245 |
| 499 | 5991 | 59889 | 23956 | 5989 | 10002 | 26838 | 10736 | 5368 |
| 499 (5% padding) |
6291 | 62883 | 25154 | 6289 | 10502 | 28180 | 11272 | 5636 |
Main Stat Requirements
Knowing the stat/HP/MP requirements for the tests at particular basement levels allows for the conversion of the challenges into statements about main stat.
The three stat equalization potions first treat the off-stats as if they were equal to the unbuffed potion stat, and then calculate percentage boosts of off-stats as if they were the potion stat. Hence stat tests of all three stripes are really tests of main stat, which is in practice highest.
- oil of stability -- equalizes base Moxie and Mysticality to base Muscle, and calculates percentage Moxie/Mysticality boosts as if they were equal to Muscle
- oil of expertise -- equalizes everything to Mysticality
- oil of slipperiness -- equalizes everything to Moxie
For the elemental tests, given a resistance level, the expected damage can be calculated, and HP can be related to the Muscle stat, which can be related to main stat as above. Similar reasoning applies to the HP/MP tests.
For the purposes of generality, the following assumes the equipment available to a diver is of negligible help. Since percentage boosts are much better than absolute boosts at the stat levels being discussed, and it is tedious to layer on many buffs at once, only common, cheap percentage buffs will be assumed for the following discussion. A complete list of percentage buffs can be viewed at the appropriate sub-page of the Dressing For Success project.
The important potion buffs include:
- 200% single-stat potion
- 100% single-stat potion
- 100% potion of temporary gr8tness
- 100% (approximately) for 30 turns of the six wad effects -- this requires the use of three mojo filters to free up spleen if Spleen of Steel is unavailable
- 50% tomato juice of powerful power
- 25% Dungeons of Doom potion
- 20% Worm Wood item:
- bellhop bell -- +20% Muscle, -20% Mysticality
- bottled inspiration -- +20% Mysticality, -20% Moxie
- sensitive poetry journal -- +20% Moxie, -20% Muscle
- 10% Black Market item
- 10% Flower Power -- this requires available fullness or drunkenness
- 10% Stevedave's Shanty of Superiority
This totals to +625% from "easy stat buffs" anyone can maintain. The following table then calculates the required main stat for every 25th basement level according to the equations listed previously, as well as the required stat with a 5% safety margin, given the easy buffs shown. Because of class differences, several common scenarios need to be spelled out for the HP, MP, and element tests.
- Class differences do not affect Muscle, Mysticality, or Moxie tests, and thus there is only one column.
- Muscle classes get an innate 50% HP bonus. Tao of the Terrapin enables a large boost in DA. Hence the HP test has four columns.
- Mysticality classes get an innate 50% MP bonus. The MP test can be divided into Mysticality/non-Mysticality.
- Mysticality classes cap their elemental resistance at 80%, whereas other classes cap at 60%. The innate HP bonus again has an effect. Moxie classes lose out on both the HP and 80% cap, so in practice there are three elemental categories: Muscle (60% resistance, +50% HP), Mysticality (80% resistance), and Moxie (60% resistance). The numbers in the table assume that the correct powder potion has been imbibed to reduce one element to negligible damage.
While the above does not capture the full range of possibilities given the passive skills available, it gives a good idea of what is possible.
| BL | Stat | Phys (Mus, 60% DA) |
Phys (Mus, 90% DA) |
Phys (Other, 60% DA) |
Phys (Other, 90% DA) |
Drain (Other) |
Drain (Myst) |
Elt (Mus) |
Elt (Mys) |
Elt (Mox) |
|---|---|---|---|---|---|---|---|---|---|---|
| 24 | 13 | 32 | 8 | 47 | 12 | 20 | 14 | 15 | 11 | 22 |
| 24 (5% padding) |
13 | 33 | 8 | 50 | 12 | 21 | 14 | 15 | 11 | 23 |
| 49 | 33 | 86 | 21 | 128 | 32 | 54 | 36 | 39 | 29 | 58 |
| 49 (5% padding) |
35 | 90 | 23 | 135 | 34 | 57 | 38 | 41 | 30 | 61 |
| 74 | 58 | 152 | 38 | 228 | 57 | 96 | 64 | 69 | 51 | 103 |
| 74 (5% padding) |
61 | 160 | 40 | 240 | 60 | 101 | 67 | 72 | 54 | 108 |
| 99 | 87 | 229 | 57 | 343 | 86 | 144 | 96 | 103 | 77 | 154 |
| 99 (5% padding) |
91 | 240 | 60 | 361 | 90 | 151 | 101 | 108 | 81 | 162 |
| 124 | 118 | 314 | 78 | 471 | 118 | 197 | 131 | 141 | 106 | 211 |
| 124 (5% padding) |
124 | 329 | 82 | 494 | 124 | 207 | 138 | 148 | 111 | 222 |
| 149 | 153 | 406 | 101 | 609 | 152 | 255 | 170 | 182 | 137 | 273 |
| 149 (5% padding) |
160 | 426 | 107 | 639 | 160 | 267 | 178 | 191 | 143 | 287 |
| 174 | 190 | 504 | 126 | 756 | 189 | 316 | 211 | 226 | 170 | 339 |
| 174 (5% padding) |
199 | 529 | 132 | 794 | 199 | 332 | 221 | 237 | 178 | 356 |
| 199 | 229 | 608 | 152 | 912 | 228 | 381 | 254 | 273 | 205 | 409 |
| 199 (5% padding) |
240 | 639 | 160 | 958 | 240 | 400 | 267 | 287 | 215 | 430 |
| 224 | 270 | 718 | 180 | 1077 | 269 | 450 | 300 | 322 | 241 | 483 |
| 224 (5% padding) |
284 | 754 | 188 | 1131 | 283 | 472 | 315 | 338 | 254 | 507 |
| 249 | 313 | 832 | 208 | 1249 | 312 | 522 | 348 | 373 | 280 | 560 |
| 249 (5% padding) |
329 | 874 | 219 | 1311 | 328 | 548 | 365 | 392 | 294 | 588 |
| 274 | 358 | 952 | 238 | 1428 | 357 | 596 | 398 | 427 | 320 | 640 |
| 274 (5% padding) |
376 | 999 | 250 | 1499 | 375 | 626 | 418 | 448 | 336 | 672 |
| 299 | 404 | 1076 | 269 | 1613 | 403 | 674 | 450 | 482 | 362 | 723 |
| 299 (5% padding) |
424 | 1129 | 282 | 1694 | 424 | 708 | 472 | 506 | 380 | 759 |
| 324 | 452 | 1203 | 301 | 1805 | 451 | 754 | 503 | 539 | 405 | 809 |
| 324 (5% padding) |
475 | 1264 | 316 | 1895 | 474 | 792 | 528 | 566 | 425 | 850 |
| 349 | 502 | 1335 | 334 | 2003 | 501 | 837 | 558 | 599 | 449 | 898 |
| 349 (5% padding) |
527 | 1402 | 351 | 2103 | 526 | 879 | 586 | 629 | 471 | 943 |
| 374 | 552 | 1471 | 368 | 2207 | 552 | 922 | 615 | 659 | 495 | 989 |
| 374 (5% padding) |
580 | 1545 | 386 | 2317 | 579 | 968 | 645 | 692 | 519 | 1039 |
| 399 | 605 | 1611 | 403 | 2416 | 604 | 1009 | 673 | 722 | 541 | 1083 |
| 399 (5% padding) |
635 | 1691 | 423 | 2537 | 634 | 1060 | 707 | 758 | 569 | 1137 |
| 424 | 658 | 1754 | 439 | 2631 | 658 | 1099 | 733 | 786 | 590 | 1179 |
| 424 (5% padding) |
691 | 1841 | 460 | 2762 | 691 | 1154 | 769 | 825 | 619 | 1238 |
| 449 | 713 | 1900 | 475 | 2850 | 713 | 1191 | 794 | 852 | 639 | 1277 |
| 449 (5% padding) |
749 | 1995 | 499 | 2993 | 748 | 1250 | 834 | 894 | 671 | 1341 |
| 474 | 770 | 2050 | 513 | 3075 | 769 | 1284 | 856 | 919 | 689 | 1378 |
| 474 (5% padding) |
808 | 2152 | 538 | 3229 | 807 | 1348 | 899 | 965 | 724 | 1447 |
| 499 | 827 | 2203 | 551 | 3304 | 826 | 1380 | 920 | 987 | 740 | 1481 |
| 499 (5% padding) |
868 | 2313 | 578 | 3469 | 867 | 1449 | 966 | 1037 | 777 | 1555 |
The last row, 499, is most informative. It shows that all classes really need Tao to survive the HP test. Muscle/Moxie classes really need Wisdom of the Elder Tortoises in order to make diving feasible. Mysticality classes fare best against the elemental tests. Moxie classes are the worst in every category.
Strategy
From the information above, conclusions can be drawn about configurations that are very useful to have in a basement dive.
Permed Skills
Doing a dive without these skills can significantly increase the time and Meat costs of reaching level 500.
- For most of the combat challenges, an uncapped combat spell will help: Fearful Fettucini, Saucegeyser, or Weapon of the Pastalord. Pastalord normally does only physical damage, which can be a problem for the ghost, but this can be rectified by using powder potions.
- Spectral Snapper helps against the beer golem if spells aren't getting through. However, if one must choose between an uncapped spell or Snapper, the spell is a better choice, because it scales to a larger portion of main stat, and there are percentage-based spell damage increasers.
- It's difficult to maximize DA without Tao of the Terrapin, and it helps with combats as well as the HP test.
- Wisdom of the Elder Tortoises gives a 50% MP bonus, making the MP test much easier.
- Spirit of Ravioli provides a 25% HP bonus.
- Impetuous Sauciness gives five extra turns when drinking Sauceror potions, driving down costs.
Several buffs help in diving, but are available via buffbots and do not need to be permed.
- Stevedave's Shanty of Superiority grants +10% to all attributes.
- Elemental Saucesphere gives +20% resistance.
- Astral Shell gives +10% resistance, and helps to reach the 1000 DA cap.
- Ghostly Shell helps with DA.
- Empathy of the Newt provides +5 familiar weight if familiars are a part of the diving strategy.
Several other skills are not "must-have" like the above, but do simplify a dive.
- The five passive resistance skills can free up equipment slots for more Muscle/HP buffing.
- Torso Awaregness allows the wearing of shirts to help maximize resistance/DA.
- Spirit of Rigatoni enables the wielding of chefstaves, the bonus spell damage of which is nothing to sneeze at.
- Rage of the Reindeer gives a 10% Muscle boost.
- Gnomish Hardigness and Cosmic Ugnderstanding provide modest HP and MP percentage bonuses.
- Amphibian Sympathy and Leash of Linguini increase familiar weight.
- Springy Fusilli and Overdeveloped Sense of Self Preservation help with winning initiative.
- Entangling Noodles provides a low-cost way of getting free hits as monsters get tougher.
- Cannelloni Cocoon heals all HP; scrolls of drastic healing accomplish much the same thing pretty cheaply.
Class Choices
As noted previously, there are several innate differences between character classes that can help one decide whether to do a dive on the current ascension.
- Mysticality classes have a resistance cap of 80%, and also an MP bonus of 50%. Saucerors get a five-turn duration bonus when imbibing saucecrafting potions (on top of any Impetuous Sauciness bonus), and additionally cook potions at a 3:1 product-to-ingredient ratio. For this reason, Saucerors are accepted as the cheapest class to dive.
- Muscle classes have a lower resistance cap of 60%, which is somewhat ameliorated with an intrinsic 50% HP bonus. Those needing to level and unwilling to clover their stats due to expenses might prefer Muscle classes to Mysticality ones, because of the Louvre Muscle reward speeding level-grinding.
- Moxie classes have neither HP nor MP bonuses, and have a 60% resistance cap. They are the worst classes to use in a dive.
Familiars
Given that there are no item or Meat drops in the basement, and monster levels ramp up so high so quickly, very few familiars are actually useful in a dive.
- An Exotic Parrot helps with the elemental tests, without taking up an equipment slot.
- A Levitating Potato can block attacks, which may be particularly helpful against the beer golem.
- A Hovering Sombrero may be a good choice for increasing the already large stat gains at deep basement levels.
Equipment Choices
The Dressing For Success pages offer many hints on how to raise stats high enough to defeat the attribute challenges. However, several pieces of equipment are very useful in a dive and deserve explicit mention.
- The Ascension Rewards for Hardcore, HCO, and Bad Moon runs give very good stat buffs, often among the best of any equipment available.
- Due to the way that spell damage is calculated, a longhaired hippy wig (+5% Mysticality) may be a better choice for spellslinging than regular spell damage increasers.
- A battered hubcap gives 20% resistance, as well as Muscle and HP increases.
- Those lucky enough to own a navel ring of navel gazing can use it to good effect. Not only does it offer a hefty percentage of Bonus Spell Damage, but its intrinsic dodging ability can help against high-level monsters.
- Divers having problems with combat encounters at the end of their dive may need to resort to shrinking powder, which can be expensive.
- In practice, maximizing elemental resistance is easy even without passive skills and great equipment. Sans dietary effects, 60% can be achieved with public buffs and readily available potions. An Exotic Parrot of 40 lbs will add an additional 20% to reach the 80% cap for Mysticality players.
- If the elemental tests are proving difficult, the 90% resistance semi-rares can let off some pressure. They are not affected by resistance caps. Again, this could get expensive:
- Stunning items can be a help if monsters cannot be killed quickly.
General Strategy
- Characters willing to use up their fullness can drink Jumbo Dr. Lucifers to cheaply refill their MP for the MP tests.
- Those having trouble passing the tests should save the diet buffs (e.g., wad effects, Flower Power) for basement diving later in their KoL day, after they've had a chance to raise their main stat some more.
- The attribute and damage tests are not necessarily constant; due to the variations, one can pass a test with the exact same stats that have failed previously.
- Doing the Mysterious Island Quest's side-quests as a Frat will be helpful. Mysterious Island Arena's Frat reward includes the Elvish buff, and the Nunnery's Frat reward heals up to 3,000 HP and MP per day.
Optimal Time to Start a Dive
Many players choose to do their dives concurrently with attaining their level 30 class trophies (e.g., the Seal Clubber's Scourge of Seals), as the high main stat at level 30 makes for an easier dive. However, a dive need not start at level 30, because the stat rewards over the course of finishing 500 basement levels are considerable, due to monster levels scaling exponentially. At level 100, 300 stats per combat are expected, roughly half of which will be distributed into the main stat. At level 400, over 2000 stats per combat will be earned.
Yeah, this section is kinda gonna be left incomplete since the distributions of combats versus stat tests are currently unknown.
Cost Expectations
Another question of interest concerns the expected buff costs for the various potions required for a successful level 500 dive. It is possible to calculate a cost ceiling for a dive, by summing over the potion costs of sustaining the buffs listed in the number-crunching section. While it is not necessary to be fully buffed all the time, the equalizing potions, xform effects, and healing/effect removal costs do eat up some of the overestimate.
It'd be kinda neat to have this estimate, but as before, it's difficult to calculate.
Notes
- The original spading and strategizing for basement diving was largely done in the HCO forum.
