Fernswarthy's Basement: Difference between revisions
imported>Gorank mNo edit summary |
imported>Discordance m Discordance moved page The Basement to Fernswarthy's Basement over redirect: correct name |
||
| (26 intermediate revisions by 18 users not shown) | |||
| Line 1: | Line 1: | ||
{{NeedsSpading|comment=Relative frequency of encounters (see [[#Notes]]).}} | {{NeedsSpading|comment=Relative frequency of encounters (see [[#Notes]]).}} | ||
''Not to be confused with [[The Castle in the Clouds in the Sky (Basement)]] (level 10 quest).'' | |||
[[ | [[File:ruins_1b.gif|Fernswarthy's Basement|center]] | ||
'''Fernswarthy's Basement''', located in [[The Ruins of Fernswarthy's Tower]], is just that. A basement. Except that it's a basement without any apparent bottom. The obstacles you must overcome to continue downwards become progressively harder as you go. Some rooms contain a monster to fight, and some contain tests of your [[Muscle]], [[Mysticality]], [[Moxie]] or endurance. Every fifth room, however, gives you the chance to boost one of your stats. Additionally, every hundredth room, you will receive rare and powerful consumable items (or other useful items, if you descend far enough). Fernswarthy's Basement becomes available once you [[Into the Maw of Deepness|find the trap-door]] during [[The Wizard of Ego]] quest. | '''Fernswarthy's Basement''', located in [[The Ruins of Fernswarthy's Tower]], is just that. A basement. Except that it's a basement without any apparent bottom. The obstacles you must overcome to continue downwards become progressively harder as you go. Some rooms contain a monster to fight, and some contain tests of your [[Muscle]], [[Mysticality]], [[Moxie]] or endurance. Every fifth room, however, gives you the chance to boost one of your stats. Additionally, every hundredth room, you will receive rare and powerful consumable items (or other useful items, if you descend far enough). Fernswarthy's Basement becomes available once you [[Into the Maw of Deepness|find the trap-door]] during [[The Wizard of Ego]] quest. | ||
| Line 81: | Line 82: | ||
==Monsters== | ==Monsters== | ||
{{combat|name= | {{combat|name=Beast with X Ears|MoxieNoHit=(Scales with floor)}} | ||
{{combat|name= | {{combat|name=Beast with X Eyes|MoxieNoHit=(Scales with floor)|note1=Very high combat initiative.}} | ||
{{combat|name= | {{combat|name=Ghost of Fernswarthy's Grandfather|MoxieNoHit=(Scales with floor)}} | ||
{{combat|name= | {{combat|name=X Bottles of Beer on a Golem|MoxieNoHit=(Scales with floor)|note1=Blocks most spells.}} | ||
{{combat|name= | {{combat|name=X Stone Golem|MoxieNoHit=(Scales with floor)}} | ||
{{combat|name= | {{combat|name=X-dimensional horror|MoxieNoHit=(Scales with floor)|note1=Blocks most physical attacks.}} | ||
{{combat|name= | {{combat|name=X-headed Hydra|MoxieNoHit=(Scales with floor)}} | ||
==Skill Tests== | ==Skill Tests== | ||
All the stat tests are believed to have a variance of +/-10%. That is, to pass a stat test at a given depth L, your appropriate buffed stat will have to exceed a randomly chosen value between ''0.9 L<sup>1.4</sup>'' and ''1.1 L<sup>1.4</sup>''. | |||
===Muscle Tests=== | ===Muscle Tests=== | ||
See [[Maximizing Your Muscle]] for a guide to obtain the highest muscle, or refer to [[Muscle Modifiers]] for a comprehensive list of all muscle modifiers in the game. | See [[Maximizing Your Muscle]] for a guide to obtain the highest muscle, or refer to [[Muscle Modifiers]] for a comprehensive list of all muscle modifiers in the game. | ||
| Line 110: | Line 113: | ||
See [[Elemental Resistance]] for a comprehensive list of all elemental resistance increasers in the game. Being in the appropriate elemental form will reduce one of the damage types to 1, but make sure that you do not use the form that doubles the other elemental damage type. For example, using [[sleazeform]] against Singled Out will reduce sleaze damage to 1 but double cold damage. | See [[Elemental Resistance]] for a comprehensive list of all elemental resistance increasers in the game. Being in the appropriate elemental form will reduce one of the damage types to 1, but make sure that you do not use the form that doubles the other elemental damage type. For example, using [[sleazeform]] against Singled Out will reduce sleaze damage to 1 but double cold damage. | ||
{{choice|name=Singled Out|choice1name=Drink the Drunk's Drink!|choice1=Tests {{element| | {{choice|name=Singled Out|choice1name=Drink the Drunk's Drink!|choice1=Tests {{element|Cold|Resistance}} and {{element|Sleaze|Resistance}}. [[Coldform]] reduces cold to 1.|image=coldmarg.gif}} | ||
{{choice|name=Peace, Bra|choice1name=Hold your nose and watch your back|choice1=Tests {{element| | {{choice|name=Peace, Bra!|choice1name=Hold your nose and watch your back|choice1=Tests {{element|Sleaze|Resistance}} and {{element|Stench|Resistance}}. [[Sleazeform]] reduces sleaze to 1|image=fratbong.gif}} | ||
{{choice|name=Still Better Than Pistachio|choice1name=Pwn the Cone|choice1=Tests {{element| | {{choice|name=Still Better Than Pistachio|choice1name=Pwn the Cone|choice1=Tests {{element|Stench|Resistance}} and {{element|Hot|Resistance}}. [[Stenchform]] reduces stench to 1|image=onnastick.gif}} | ||
{{choice|name=Unholy Writes|choice1name=What's a Typewriter, Again?|choice1=Tests {{element| | {{choice|name=Unholy Writes|choice1name=What's a Typewriter, Again?|choice1=Tests {{element|Hot|Resistance}} and {{element|Spooky|Resistance}}. [[Hotform]] reduces hot to 1|image=document.gif}} | ||
{{choice|name=The Unthawed|choice1name=Evade the Vampsicle|choice1=Tests {{element| | {{choice|name=The Unthawed|choice1name=Evade the Vampsicle|choice1=Tests {{element|Spooky|Resistance}} and {{element|Cold|Resistance}}. [[Spookyform]] reduces spooky to 1|image=snowballbat.gif}} | ||
===MP Drainage Test=== | ===MP Drainage Test=== | ||
See [[Maximizing Your MP]] for a guide to obtain the highest MP, or refer to [[MP | See [[Maximizing Your MP]] for a guide to obtain the highest MP, or refer to [[MP Modifiers]] for a comprehensive list of all MP modifiers in the game. | ||
{{ | |||
{{choice|name=A Festering Powder|choice1name=Grab the Handles|choice1=Drains about 1.67 * lvl<sup>1.4</sup> MP, with a variation which is less than 5%.|image=powderbox.gif}} | |||
===HP Drainage Test=== | ===HP Drainage Test=== | ||
See [[Maximizing Your HP]] for a guide to obtain the highest HP, or refer to [[HP | See [[Maximizing Your HP]] for a guide to obtain the highest HP, or refer to [[HP Modifiers]] for a comprehensive list of all HP modifiers in the game. Additionally, [[Damage Absorption]] affects the amount of damage taken. See [[Maximizing Your Damage Absorption]] for a guide on obtaining the highest damage absorption. | ||
{{ | {{choice|name=Throwin' Down the Gauntlet|choice1name=Run the Gauntlet Gauntlet|choice1=Deals approximately (lvl<sup>1.4</sup>)*10 damage. |image=Haiku11.gif}} | ||
==Reward Rooms== | ==Reward Rooms== | ||
One of the stat gain rewards will appear on every floor that is a multiple of five. The only exceptions are the one-time reward rooms which occur on the first five multiples of 100. | One of the stat gain rewards will appear on every floor that is a multiple of five. The only exceptions are the one-time reward rooms which occur on the first five multiples of 100. | ||
| Line 145: | Line 151: | ||
* To get to floor 400 at level 30 (845 mainstat), all that's really needed is a 420% boost to all stats, easily attainable from reagent potions alone, and an equalizer potion. | * To get to floor 400 at level 30 (845 mainstat), all that's really needed is a 420% boost to all stats, easily attainable from reagent potions alone, and an equalizer potion. | ||
*To get to Floor 500 at level 30 requires about a 610% boost to all stats and an equalizer reagent potion. | *To get to Floor 500 at level 30 requires about a 610% boost to all stats and an equalizer reagent potion. | ||
*Clever use of Elemental Phials will greatly help with the elemental tests. Mysticality classes will generally have a much easier time with these tests (especially | *Clever use of Elemental Phials will greatly help with the elemental tests. Mysticality classes will generally have a much easier time with these tests (especially when otherwise capped at 89%, they'll take roughly half the damage of other classes at that point), and also with the MP drain test. [[Sauceror]]s in particular are a popular choice because they get more turns from each reagent potion (and they can cheaply produce any reagent potions they might need). | ||
* Muscle classes will have an easier time at the Gauntlet and Elemental tests because of their natural HP bonus. [[Seal Clubber]]s in particular can power-level to basementing levels very easily with [[Mother hellseal]]s. | |||
*Moxie classes will have the hardest time in the basement because they lack both the HP and MP bonuses the other two classes have. | |||
*Stat tests are not necessarily the limiting factor for everyone. Players without [[Torso Awaregness]] or [[Tao of the Terrapin]] may find themselves stopped at the Gauntlet; without [[Wisdom of the Elder Tortoises]], at the Festering Powder test; without an uncapped Myst damage spell, at high-HP monsters. | *Stat tests are not necessarily the limiting factor for everyone. Players without [[Torso Awaregness]] or [[Tao of the Terrapin]] may find themselves stopped at the Gauntlet; without [[Wisdom of the Elder Tortoises]], at the Festering Powder test; without an uncapped Myst damage spell, at high-HP monsters. | ||
*A not-so-mini | * If you lack an uncapped Myst spell, Divine Party Favors or Love Songs can be substituted, and you might want to anyway against Beer golems. | ||
*A not-so-mini [[Basement Diving Guide]] is available. | |||
==Notes== | ==Notes== | ||
*Once you ascend, you will need to find the basement again and begin at floor 1. | *Once you ascend, you will need to find the basement again and begin at floor 1. | ||
*You cannot [[CLEESH]] the monsters in the basement. | *You cannot [[CLEESH]] the monsters in the basement. | ||
*When beaten up you get the message "You're too beaten up to accomplish anything in the basement. Unless bleeding counts as an accomplishment." | *When beaten up you get the message "You're too beaten up to accomplish anything in the basement. Unless bleeding counts as an accomplishment." | ||
*When falling down drunk, the following message appears: "I know you've got fond memories of stumbling around your parents' basement in a drunken stupor, but this isn't that kind of basement. | *When falling down drunk, the following message appears: "I know you've got fond memories of stumbling around your parents' basement in a drunken stupor, but this isn't that kind of basement." | ||
*When out of adventures you get the message "You don't have time to screw around in Fernswarthy's Basement." | *When out of adventures you get the message "You don't have time to screw around in Fernswarthy's Basement." | ||
*There isn't any special adventure on 600th floor. | *There isn't any special adventure on 600th floor. | ||
*[http:// | *[http://hardcoreoxygenation.com/forums/viewtopic.php?p=69300 Records of encounter rates] suggest that there are 30 possible basement encounters - 1 each of MP, HP, and each resistance test; 3 each of Moxie, Myst, and Muscle stat tests; and 2 copies of each monster in the basement. | ||
==History== | |||
*Prior to January 23rd, 2007 the Basement was located in [[The Dungeon Full Of Dungeons]]: | |||
*:[[File:Basement.gif]] | |||
[[Category:Locations]] | [[Category:Locations]] | ||
Latest revision as of 19:16, 15 June 2025
There are some vague or non-exact figures and information on this page. Some spading is required.
|
Not to be confused with The Castle in the Clouds in the Sky (Basement) (level 10 quest).
Fernswarthy's Basement, located in The Ruins of Fernswarthy's Tower, is just that. A basement. Except that it's a basement without any apparent bottom. The obstacles you must overcome to continue downwards become progressively harder as you go. Some rooms contain a monster to fight, and some contain tests of your Muscle, Mysticality, Moxie or endurance. Every fifth room, however, gives you the chance to boost one of your stats. Additionally, every hundredth room, you will receive rare and powerful consumable items (or other useful items, if you descend far enough). Fernswarthy's Basement becomes available once you find the trap-door during The Wizard of Ego quest.
Level Progression
In most cases, the stat requirements to pass a floor are directly stated. For example, if you are required to dispel 468 mops, you will succeed with 468 mysticality and higher. Some monsters will display their strength as well. "The Beast with 468 eyes" will attack and defend as a level 468 monster. Some obstacles do not show their requirements, but simply increment each time you encounter them. These adventures will still scale according to the floor normally.
The stat requirements on any given floor are roughly equal to (floor)1.4, and the levels of the monsters can scale up to 2*(floor)1.4. The following table lists the approximate buffed stat required to reach each stat-boost floor. According to the Dressing For Success model, any player can achieve at least a 500% buff for each stat, the third column gives an approximate minimum unbuffed stat. A player with a main stat of 126 can use commonly-available equalizing potions, clothes, and stat-boosting potions to reach the 100th floor of the basement; advanced players and those with nice toys can obviously get by at a comparatively lower main stat.
| Floor of Basement | Stat Level | Main Stat (at 500% Buff) | Floor of Basement | Stat Level | Main Stat (at 500% Buff) | Floor of Basement | Stat Level | Main Stat (at 500% Buff) | ||
|---|---|---|---|---|---|---|---|---|---|---|
| 5 | 10 | 2 | 55 | 273 | 55 | 105 | 676 | 135 | ||
| 10 | 25 | 5 | 60 | 309 | 62 | 110 | 721 | 144 | ||
| 15 | 44 | 9 | 65 | 345 | 69 | 115 | 767 | 153 | ||
| 20 | 66 | 13 | 70 | 383 | 77 | 120 | 814 | 163 | ||
| 25 | 91 | 18 | 75 | 422 | 84 | 125 | 862 | 172 | ||
| 30 | 117 | 23 | 80 | 462 | 92 | 130 | 911 | 182 | ||
| 35 | 145 | 29 | 85 | 503 | 101 | 135 | 960 | 192 | ||
| 40 | 175 | 35 | 90 | 544 | 109 | 140 | 1011 | 202 | ||
| 45 | 206 | 41 | 95 | 587 | 117 | 145 | 1061 | 212 | ||
| 50 | 239 | 48 | 100 | 631 | 126 | 150 | 1113 | 223 |
| Floor of Basement | Stat Level | Main Stat (at 500% Buff) | Floor of Basement | Stat Level | Main Stat (at 500% Buff) | Floor of Basement | Stat Level | Main Stat (at 500% Buff) | ||
|---|---|---|---|---|---|---|---|---|---|---|
| 200 | 1665 | 333 | 1100 | 18111 | 3622 | 1900 | 38927 | 7786 | ||
| 300 | 2937 | 587 | 1200 | 20458 | 4092 | 2000 | 41826 | 8365 | ||
| 400 | 4395 | 879 | 1300 | 22884 | 4577 | 2100 | 44783 | 8957 | ||
| 500 | 6006 | 1201 | 1400 | 25385 | 5077 | 2200 | 47796 | 9559 | ||
| 600 | 7752 | 1551 | 1500 | 27960 | 5592 | 2300 | 50865 | 10173 | ||
| 700 | 9620 | 1924 | 1600 | 30603 | 6121 | 2400 | 53988 | 10798 | ||
| 800 | 11597 | 2320 | 1700 | 33314 | 6663 | 2500 | 57163 | 11433 | ||
| 900 | 13676 | 2735 | 1800 | 30690 | 7218 | 3000 | 73785 | 14757 | ||
| 1000 | 15849 | 3170 |
Monsters
| Beast with X Ears | |

|
|
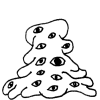
| Beast with X Eyes | |
|
|
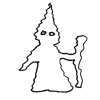
| Ghost of Fernswarthy's Grandfather | |
|
|
| X Bottles of Beer on a Golem | |

|
|
| X Stone Golem | |

|
|
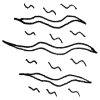
| X-Dimensional Horror | |
|
|
| X-Headed Hydra | |

|
|
Skill Tests
All the stat tests are believed to have a variance of +/-10%. That is, to pass a stat test at a given depth L, your appropriate buffed stat will have to exceed a randomly chosen value between 0.9 L1.4 and 1.1 L1.4.
Muscle Tests
See Maximizing Your Muscle for a guide to obtain the highest muscle, or refer to Muscle Modifiers for a comprehensive list of all muscle modifiers in the game.
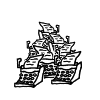
| Lift 'em! | |
|
|
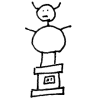
| Push it Real Good | |
|
|
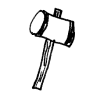
| Ring that Bell | |
|
|
Mysticality Tests
See Maximizing Your Mysticality for a guide to obtain the highest mysticality, or refer to Mysticality Modifiers for a comprehensive list of all mysticality modifiers in the game.
| Gathering: The Magic | |

|
|
| Mop the Floor with the Mops | |
|
|
| Do away with the 'doo | |
|
|
Moxie Tests
See Maximizing Your Moxie for a guide to obtain the highest moxie, or refer to Moxie Modifiers for a comprehensive list of all moxie modifiers in the game.
| Don't Wake the Baby | |

|
|
| Grab a cue | |
|
|
| Put on the Smooth Moves | |
|
|
| Put on the Smooth Moves | |
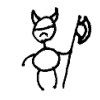
|
|
Elemental Damage Tests
The basement's elemental damage tests each inflict two types of elemental damage. The amount of damage you'll take from each element is roughly 4.5*(floor)1.4, so without being in an elemental form, you should expect roughly 9*(floor)1.4 total damage, before elemental resistance. A single damage value is calculated (including random variance), and each of the two elemental attacks has this same power level. Resistance is applied separately to each attack.
See Elemental Resistance for a comprehensive list of all elemental resistance increasers in the game. Being in the appropriate elemental form will reduce one of the damage types to 1, but make sure that you do not use the form that doubles the other elemental damage type. For example, using sleazeform against Singled Out will reduce sleaze damage to 1 but double cold damage.
| Singled Out | |
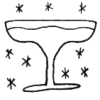
|
|
| Peace, Bra! | |
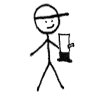
|
|
| Still Better Than Pistachio | |
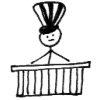
|
|
| Unholy Writes | |

|
|
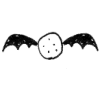
| The Unthawed | |
|
|
MP Drainage Test
See Maximizing Your MP for a guide to obtain the highest MP, or refer to MP Modifiers for a comprehensive list of all MP modifiers in the game.
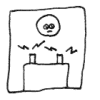
| A Festering Powder | |
|
|
HP Drainage Test
See Maximizing Your HP for a guide to obtain the highest HP, or refer to HP Modifiers for a comprehensive list of all HP modifiers in the game. Additionally, Damage Absorption affects the amount of damage taken. See Maximizing Your Damage Absorption for a guide on obtaining the highest damage absorption.
| Throwin' Down the Gauntlet | |

|
|
Reward Rooms
One of the stat gain rewards will appear on every floor that is a multiple of five. The only exceptions are the one-time reward rooms which occur on the first five multiples of 100.
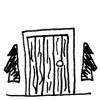
| Got Silk?/Leather is Betther | |
|
|
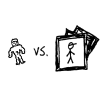
| Save the Dolls/Save the Cardboard | |
|
|
| Take the Red Pill/Take the Blue Pill | |
|
|
| De Los Dioses | |

|
|
| The Dusk Zone | |
|
|
| Giggity Bobbity Boo! | |
|
|
| No Good Deed | |

|
|
| Fernswarthy's Basement, Level 500 | |
|
|
Basement-diving Miniguide
- Stat tests at floor N require about N1.4 buffed stat.
- To get to floor 400 at level 30 (845 mainstat), all that's really needed is a 420% boost to all stats, easily attainable from reagent potions alone, and an equalizer potion.
- To get to Floor 500 at level 30 requires about a 610% boost to all stats and an equalizer reagent potion.
- Clever use of Elemental Phials will greatly help with the elemental tests. Mysticality classes will generally have a much easier time with these tests (especially when otherwise capped at 89%, they'll take roughly half the damage of other classes at that point), and also with the MP drain test. Saucerors in particular are a popular choice because they get more turns from each reagent potion (and they can cheaply produce any reagent potions they might need).
- Muscle classes will have an easier time at the Gauntlet and Elemental tests because of their natural HP bonus. Seal Clubbers in particular can power-level to basementing levels very easily with Mother hellseals.
- Moxie classes will have the hardest time in the basement because they lack both the HP and MP bonuses the other two classes have.
- Stat tests are not necessarily the limiting factor for everyone. Players without Torso Awaregness or Tao of the Terrapin may find themselves stopped at the Gauntlet; without Wisdom of the Elder Tortoises, at the Festering Powder test; without an uncapped Myst damage spell, at high-HP monsters.
- If you lack an uncapped Myst spell, Divine Party Favors or Love Songs can be substituted, and you might want to anyway against Beer golems.
- A not-so-mini Basement Diving Guide is available.
Notes
- Once you ascend, you will need to find the basement again and begin at floor 1.
- You cannot CLEESH the monsters in the basement.
- When beaten up you get the message "You're too beaten up to accomplish anything in the basement. Unless bleeding counts as an accomplishment."
- When falling down drunk, the following message appears: "I know you've got fond memories of stumbling around your parents' basement in a drunken stupor, but this isn't that kind of basement."
- When out of adventures you get the message "You don't have time to screw around in Fernswarthy's Basement."
- There isn't any special adventure on 600th floor.
- Records of encounter rates suggest that there are 30 possible basement encounters - 1 each of MP, HP, and each resistance test; 3 each of Moxie, Myst, and Muscle stat tests; and 2 copies of each monster in the basement.
History
- Prior to January 23rd, 2007 the Basement was located in The Dungeon Full Of Dungeons:
